But how you clean your hair straightening brush is the most important thing. For proper cleaning, you need to follow a process that guarantees your safety and that of the brush. In this guide, we have put together 7 steps that will enable you to clean your hairbrush straightener like a pro:
1. Remove Strands the Right Way
The first steps should be getting hair strands off the brush bristles. When the strands accumulate in the brush, they make it hard to straighten your hair since they absorb most of the heat. All the hair that breaks when straightening usually gets tangled between the bristles of your hairbrush straightener. Getting rid of these strands can be a bit tough, depending on the kind of hair it has been straightening. But you can make it easy by using the right tools.
Make sure that brush is unplugged and cooled. Then hold the brush in one hand firmly and pull up the strands carefully using a closed scissor or a rat tail comb. Make sure that you are avoiding breaking the bristles. Ensure that most of the strands have been removed before processing to the next stage.
2. Blow Dry the Brush
The second step is blow drying the straightening brush after you have removed most of the strands. Hair strands are not the only thing that sticks to the bristles. There are also dust, dirt, and build-up from hair styling products that may not be removed using the scissors and other tools. You can easily remove these things by blowing them away with your blow dryer. This step is very crucial, especially for a brush that has not been cleaned for a long time.
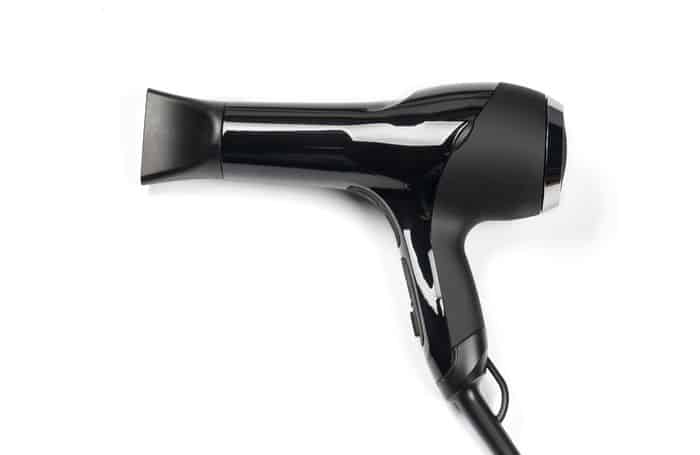
For you to blow dry your straightening brush properly, plug in your blow dryer and set it at medium speed. The mistake some people make is setting maximum speed. When the speed is too high, the blow dryer may generate a lot of heat, and this could damage the brush. With medium speed, you will give your straightening brush’s bristles a proper blow-dry that to remove build-up.
3. Use a Brush
Blow drying will not remove all debris and strands in the straightening brush. So, you need to find another more effective method to remove the small debris and dirt still attached to the plates and bristles. A brush that contains thin bristles is the best tool to handle this step. The thin bristles work perfectly in collecting most of the remaining hair strands and small debris in the brush. They are also harmless and will not cause scratching of the brush.
However, do not use a toothbrush for cleaning. Their bristles are usually hard, and they can cause scratches. If you have a pipe cleaner or dental floss, they have the perfect bristles for this cleaning. Ensure that you have all the spaces between bristles are cleaned thoroughly.
4. Clean With a Soft Cloth
The brush will remove most of the small strands and debris the blow dryer couldn’t. However, it will not remove most of the tough build-ups and residues of hair styling products on the brush. What you need to clean off such build-up and residue is a small, soft microfibre cloth. The cloth will remove most of the residue still stuck on the bristles and the plates.
Dampen the cloth in lukewarm water so that the small rise in temperature can melt dirt build-up and hair treatment residues. Then wipe the brush properly with the cloth. While wiping, you can keep dampening the soft microfibre cloth in warm water. This will help to maintain a temperature needed to melt build-ups and residues.
5. Use Wet Tissues with Cotton Buds
This step is necessary for the cleaning of the plates. What you need is a wet tissue and cotton bud to clean the plates. The cotton bud helps you to reach the plates through bristles, something that tools in previous steps couldn’t. The facial tissue enables you to scrub your plates without caused scratches.
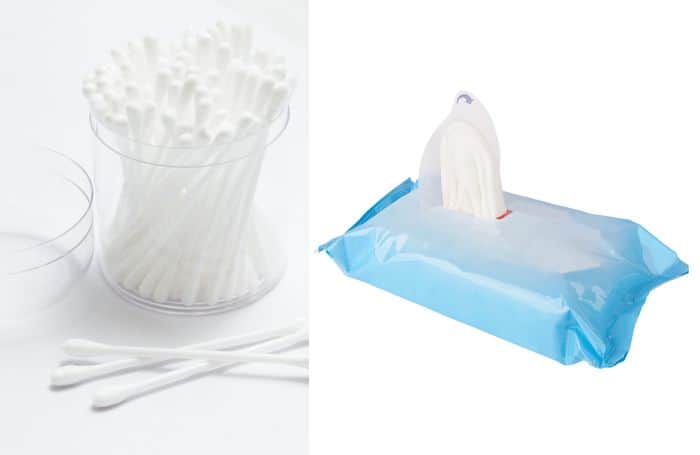
Start with dampening the tissue in lukewarm water for a little while. The warm water helps to melt build-ups and residues still attached to the plates. Then wrap the wet tissue around a cotton bud and gently clean the spaces between the bristles. You should see the straightening brush plates start gaining their original form.
6. Use Cleaning Solutions
Cleaning solutions are simply chemicals that help to clean off the remaining build-ups and residues from hair styling products. Even with the use of brushes, wet clothes, and cotton buds, you cannot get rid of all the dirt on. However, you need to choose the cleaning solution carefully because some can damage your brush.
Mild cleaning solutions such as rubbing alcohol, liquid Castile soaps, and clarifying shampoos are recommended options. You only need to mix a drop or two drops of cleaning solution with lukewarm water. Then dip a cotton bud or small fibre cloth on the solution and wipe the brush. Do not use the cleaning solution frequently because it can damage the brush. Use it only when the brush has not been cleaned for a long time.
7. Let the Brush Dry
Now that you’re finished cleaning the straightening brush, you need to dry off the cleaning solution. You can use your blow dryer to dry it if you want to straighten hair with it immediately. But if not in a hurry, sun-dry it. If possible, don’t use the brush that day.
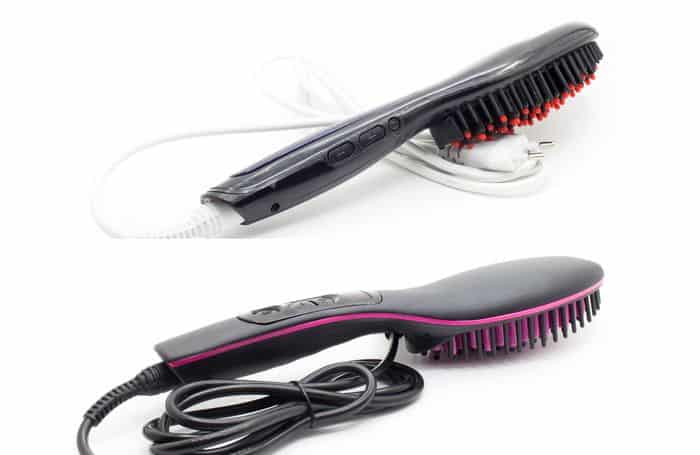
If your hair straightening brush has become ineffective because of the dirt, strands, and residues from hair styling products, use these steps to clean to restore it. By cleaning your brush regularly, you will find the process very simple, and you might avoid some steps, such as step 6, most of the time. Need more tips on using your straightening brush? See this article.
]]>Where to Buy the Best Hair Straightener?
As with so many products, when you buy a flat iron, your two options are to go into a store or to buy a straightener online. A store can be nice when you’re looking for advice and recommendations from a salesperson but do remember that they’re going to try and sell you the most expensive product they have. It might not actually be the best option for your needs. They also don’t give you much time to compare hair straighteners and will never give you advice on other stores if you ask where to buy hair straighteners. And they will never actually explain how to choose a hair straightener yourself. 
When you shop online, you have all the same choices as in a store, plus the extra convenience of not having to leave your house. You also have much more time to check out flat iron prices and find the best straightener to buy without the pressure of making a purchase immediately.
If you’re looking online for where to buy a hair straightener, check both the manufacturer’s website as well as any beauty-type store sites. These tend to have straight to the point prices and give you the chance to compare flat iron prices while looking for the best flat iron to buy.
When you finally decide to buy a straightener, don’t just buy it immediately, even though it might be tempting. Websites tend to have sales, which can give you a significant discount off of top styler prices, allowing you to stretch your budget a little bit further.
Just a quick word of warning — when you’re looking for sites where to buy hair straightners and the straightener price looks too good, this deal may be misleading. Many sites sell knock-off hair straighteners that may seem similar to top brand-name models but are far inferior and are more likely to damage your hair.
What is the Best Flat Iron Hair Straightener?
Before we dive into our top pick for flat irons, we should probably talk about what is a good flat iron and how you can tell the good ones from the bad. The first step should always be to research the brand. Some brands, like CHI and GHD, are well known over the world, and you usually won’t go wrong with their products. They typically come top in ‘What’s the Best Flat Iron?’ lists and are recommended by both salons and DIY stylists.
But you didn’t come here for us not to tell you what are the best flat irons, you want recommendations. So without further ado, our top pick for what is the best flat iron to buy is the GHD V Gold Max Hair Styler. 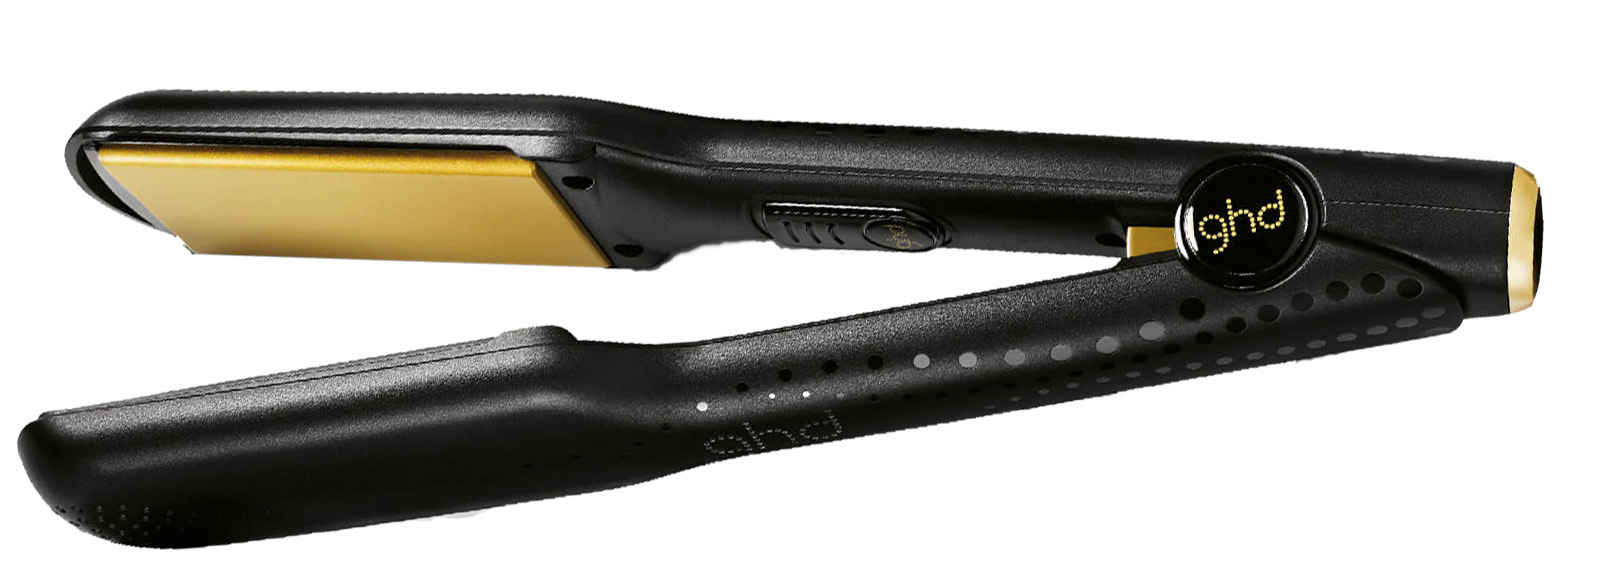
What makes the GHD V Gold Max Styler special is the extra-wide plates combined with titanium and gold technology. The gold titanium plates are excellent at heating up and retaining that heat, while the gold allows the plates to glide effortlessly even through extremely thick or curly hair. Unlike ceramic plates that can take up to a minute to heat up, the GHD V Gold Max Styler is ready to rumble in less than 30 seconds.
Because of the wide plates, hair takes much quicker to straighten than before. Even people with fine hair can benefit from wide plates because the plates can hold double the hair of a thinner plate. The only drawback of wider plates is that it’s harder to make curls and you can only really make gentle waves. If you have shorter hair and want curls, you may need to invest in a curler.
How Much Does a Flat Iron Hair Straightener Cost?
When shopping, the most common question tends to be, ‘How much does a flat iron cost?’ And the answer is, of course, it depends. Prices can vary greatly between brands and even between models of the same brand.
A good hair straightener doesn’t have to be the most expensive straightener on the market. There are plenty of high-quality flat irons in the $100 – $300 range. Some of the highest rated hair straighteners actually fall within this range, so you don’t need to break the budget to get good quality hair straighteners that will still give you high-end hair straightener results.
But if money is no object and you want a tool that will last you for years and protect your hair while you style, there are $300 hair straighteners on the market just for you.
Most Expensive Hair Straightener
When deciding how to choose a flat iron, price, unfortunately, does play a role for most of us. While it’s tempting to stick to the average straightener, some people would rather view their tool as an investment that can help protect their hair.
The GHD Platinum+ is over $300, which is a hair-raising amount for most of us. However, the price does take into account the fact that this is a high-quality hair straightener that features some of the most innovative technology on the market. 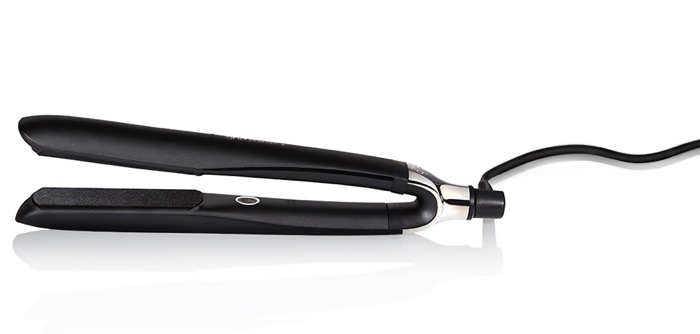
It’s fitted with SMART technology that adapts the amount of power to the hair straightener as it goes over your hair. This means that it maintains a constant temperature regardless of how thick your hair is or how fast you’re styling. Having a constant temperature means you’re less likely to harm your hair with excessive heat.
The GHD Platinum+ protects your hair while you style it. Heat is usually very damaging to hair, so investing in a product that not only saves you time but also nourishes your hair will save you money in the long run.
Best Cheap Hair Straightener
While the more expensive hair straighteners do more for you in the long run, there are still plenty of good, cheap flat irons out there. If you do your research to find the best cheap hair straightener, you can easily find a good deal on a tool that will do the job until you can save up for something fancier. You’ll be surprised how many cheap straighteners have premium features.
You can keep an eye out for hair straighteners sales and get a good cheap hair straightener to use in the meanwhile. Two products stand out as the best inexpensive hair straighteners on the market currently: the GHD Original IV Styler and the Silver Bullet Keratin. 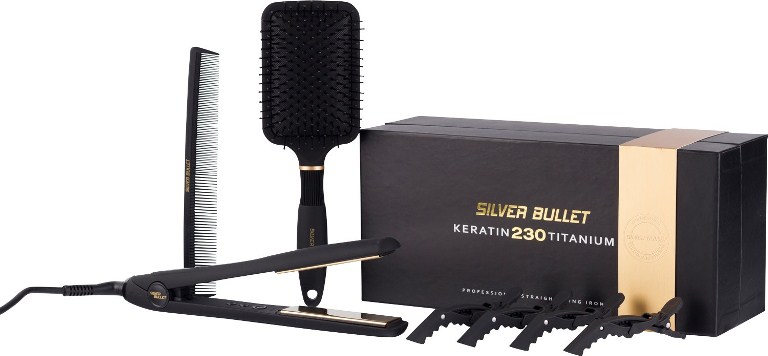
The GHD IV Styler (See Full Review Here) is under $200 and is still one of the best cheap straighteners on the market. It uses floating ceramic plates to protect your hair while you style and has an automatic sleep mode in case you’re the forgetful type. It does take a while to heat up though and is limited to 185°C, which may be too cool for thick hair. It is still one of the best affordable flat irons you can buy, particularly if you’ve got finer hair. 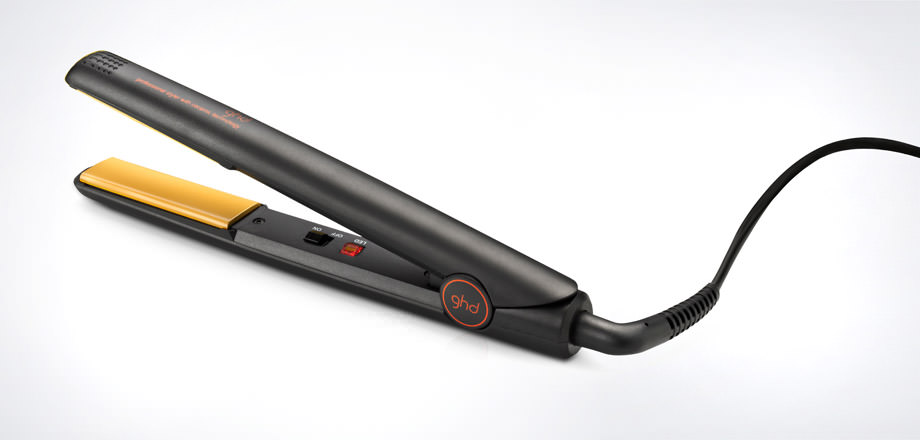
The Silver Bullet Keratin hair straightener offers the benefits of more expensive models since it’s designed to be used with keratin treatments. Keratin treatments help repair damaged hair and protect your hair during the styling process. This means that you can get one of the best inexpensive flat irons on the market and it comes with premium features such as gold-plated titanium plates.
Best Quality Hair Straightener
Salon professionals know which stylers are the best in their class, and many of them recommend GHD stylers. Spending that bit extra on a high-quality hair straightener means that you save money in the long run and you can be assured of the quality of your product.
When you buy a salon professional hair styler from GHD, you’re investing in a brand with a known track record for quality products designed to meet every individual’s particular styling needs. They have straighteners for all types of hair, so you’re certain to find something that meets your goals.
Conclusion
When shopping around for a hair straightener, you’ve got to keep in mind both your budget and your needs. Even if you’re on a budget, it’s not smart to buy no-name products in the hopes of saving money. The best affordable hair straighteners are made by reputable brands like GHD and Silver Bullet. They may cost more than some other flat irons, but you can be assured of a quality build and manufacturer’s warranty on all GHD products.
If budget is not a concern, then it’s worthwhile investing in a higher quality product. Not only do you get a longer warranty, but more expensive hair straighteners tend to have the latest technology and are more likely to protect your hair, saving you time and hassle in the long run. On a mission to improve your hair – see our hair library here
]]>From knowing what you need to do before styling your hair to straightening it in a way that is both effective and safe, it can seem like there are several factors to remember if you’re relatively new to the process. It can even be challenging to choose the right flat iron. Fortunately, we have compiled all the most essential tips and common questions to help you get the most out of straightening your hair.
Ready to learn how to flat iron your hair like a pro? Read on, because now we’ll share some tips on hair straightening.
Straighten Your Hair Perfectly
Have you ever wondered how to straighten your hair perfectly? Ever wished you could style your hair to look like you just walked out of your favourite salon? Are you unfamiliar with how to use a straightener at all? You’re in luck; with a little practice and the right tools, you’ll be able to master how to get super straight hair with a flat iron. Not only will these tips allow you to look great, but by observing them, you’ll be able to keep your hair safe and healthy while styling.
The first thing you’ll need to do is to get the best professional hair straightener for your hair type. Although it may be tempting to go for a cheaper flat iron, it’s essential to remember that not all hair straighteners are created equal. By investing in a better-quality tool, you invest in what it can do for your appearance as well as the well-being of your hair.
One fundamental point to always keep in mind is that you should never have to compromise the health of your hair to get the results you want. If you feel that your hair is becoming dried out or damaged due to regular straightening, be sure to consult a trusted hair-care professional to see what the cause might be.
Straighten Hair Quickly
Knowing how to press hair with a flat iron means knowing how to do it quickly and correctly if you’re in a rush. For those of us with limited time to get ready in the morning, it can be a struggle to make your hair look fantastic and get out the door on time. It’s normal to feel that it’s you against the clock in the morning. One of the most common questions people ask is, “How can you straighten your hair quickly?” With the right preparation, you can style your hair quickly and efficiently, and make it to work on time.
One widespread misconception is that you must trade safety for speed when trying to straighten your hair in record time. While there are some shortcuts that you can take, you don’t necessarily have to compromise the well-being of your hair to get out of the house as quickly as possible when you’re in a hurry. Time is precious, but there are a few things you can do to win a few extra minutes during your morning routine while still avoiding heat damage from your straightener.
For instance, cleaner hair can be straightened much faster and easier than unwashed hair, so be sure to shampoo, condition, and brush regularly. When your hair is soft and smooth, the flat iron can do its job speedily so you can move onto other tasks. While this does involve a bit of preparation the night before, it will inevitably save you precious minutes the following morning.
If you have very thin hair, you may even consider putting it into a low ponytail and straightening through the length of it in one swoop. After that, you can undo the ponytail and finish off the sides and any other part that was missed. This saves you the trouble of dividing your hair into different sections, which is typical for people whose hair is moderately or very thick.
If you do have thicker hair, you may want to consider a straightener that heats up quickly and has wider plates, which can straighten more hair at a given time. You’ll also want to divide your hair into separate sections to ensure that you straighten all of it evenly without applying heat to certain parts more than once.
Also, always be sure to hold your hair taut while straightening to speed up the process, and that you straighten all your hair evenly, regardless of what your preferred strategy is for dividing it into sections. This seems like an extra step, but it allows you to work through your hair more efficiently since you’ll avoid going through any given strand of hair multiple times.
Permanently Straighten Hair at Home
If you don’t have time each day to straighten your hair using a flat iron, you may be wondering, “Can you permanently straighten your hair at home?” Absolutely! There are keratin hair treatments that you can apply using a special keratin hair straightener to offer a more long-term solution for your smooth hair.
The way this works is that the keratin solution will be absorbed into your hair and sealed using the flat-iron. The appearance of increased shine, fullness, and sleekness can last from a couple of weeks up to a few months, depending on your hair and the product you use. Keratin hair straightening can be a huge game-changer once you find a product that works well for you.
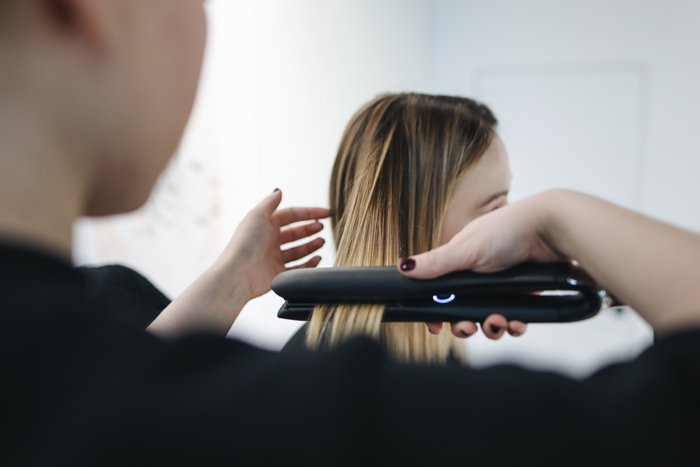
A quick tip: be sure to do your homework when it comes to opting for treatments like this, as they don’t require approval from any authority. It’s essential to be aware of what kind of products you’re using on your own. Many products on the market contain formaldehyde as the active ingredient for smooth hair, but there are also plenty of formaldehyde-free options available. We’ve covered some homemade hair straightener recipes before, while not permanent they do the job if you’re budget conscious or the shops are closed!
Is Straightening Your Hair Every Day Bad?
If you don’t know how to safely style your hair with a flat iron, straightening your hair every day can be harmful. However, the way that you prepare your hair and go through the process will make all the difference. On one hand, the heat from your straightener does have the potential to damage your hair if you’re not careful in the process. On the other hand, knowing how to perfectly flat iron your hair and treat it against heat damage can keep you looking great without causing any problems for your hair.
The first thing to keep in mind is that so many straighteners on the market today have heat settings that get way hotter than what many people need to make their hair look great. If you have relatively thin to moderately-thin hair, the temperature you use is especially important, as your minimum heat setting should be lower than that of somebody with thicker hair.
Next, ensure that your hair is mostly dry before you begin straightening. The temperature at which permanent damage can occur to your hair’s fibres will be lower when your hair is wet, and you don’t want to risk breaking down your hair when it can be avoided. Wet hair is also not ideal for styling conditions, so you’ll be doing yourself a favour in that department as well.
By being aware of the risks of exposing your hair to a flat iron that is too hot, you’ll avoid a lot of unnecessary damage and keep your locks soft and healthy. Test out different heat settings to find the lowest one that effectively works for you and remember always to straighten your hair only when it’s dry.
Keep Hair Straight after Straightening
Once you’ve straightened your hair the way you like it, the next task is to ensure that your time and effort don’t go to waste. How should you sleep with straightened hair? What steps do you need to take to ensure that it still looks great when you wake up? Let’s look at a couple of conventional methods for maintaining straight hair overnight.
Option 1: Using a headscarf — Luckily, you can achieve the results you want in a few simple steps. First off, you’ll need a head-wrapping scarf for your hair. We recommend one made of a material that minimises friction, such as satin or silk. This will lessen next-day frizz and ensure that you don’t have to tend to your hair much. These scarves are available in a wide range of styles but be sure that it fits all the way around your head no matter which one you choose.
Once you have a scarf, you can apply high keratin, low alcohol hair serum to protect your hair overnight and retain its straightness. These serums are designed to combat frizziness and humidity, so be sure to choose one that is well-suited for your hair type.
After applying the serum, brush your hair into 2–4 sections depending on its thickness. Using simple hairpins, you can secure the ends of your hair by wrapping the sections around your head and pinning them. Remember not to pin too tight, as this can cause knots to form.
Once your hair is pinned, you can finish the job by wrapping your scarf around your hair to keep everything where it belongs. This will keep your hair neatly wrapped up so that it can remain straight while you sleep.
Option 2: Foregoing the headscarf — If the method of wrapping your hair in a scarf feels a bit too restrictive for you, there are alternative measures that you can take to ensure that your hair stays straight even after a full night’s sleep. The material that your pillowcase is made of will determine the amount of friction between your hair and the pillow, so opt for material like satin or silk which minimises rubbing and pulling. On top of that, you should still pin your hair as described above, even if you decide not to use a scarf, as this will go a long way towards reducing frizzing. As always, be sure to completely dry and brush out your hair before pinning.
There are a few other small tweaks that you can make to your routine that will make a big difference in keeping your hair straight overnight. Keep the temperature in your room cool while avoiding humidity, especially during the warmer months. Supplementary products such as dry shampoo or volumising serum can also add a bit of smoothness to your hair by reducing oil and dryness.
Tools to Straighten Your Hair
Now that we’ve discussed some common questions on hair straightening, let’s go into the details of how to straighten hair. First, there are some tools you’ll need; keep in mind that different people prefer different straightening methods, so you may not need everything listed below. Consider which methods and tools would work best for you and your hair, and don’t be afraid to experiment to figure out what works and what doesn’t.
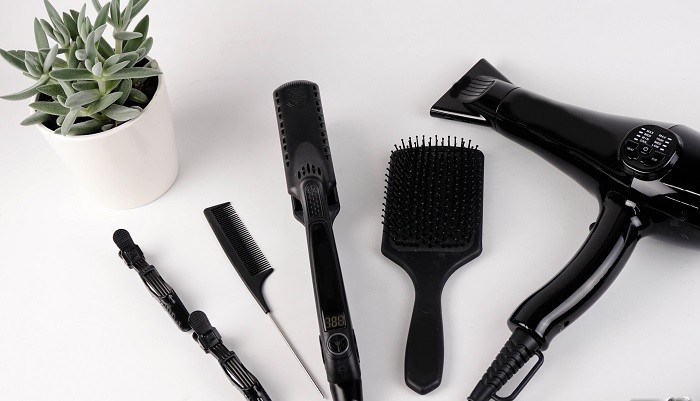
A high-quality straightener — a good-quality straightener with ceramic plates is recommended because it will allow you to heat your hair evenly for a smooth straightening job. It’s also crucial that the size of the plates correspond to your hair; narrower plates work best for shorter hair, and wider plates service longer hair better. Also, be sure to select a straightener with various heat settings, as you’ll want to find the lowest possible heat setting which can achieve the results you need. This ideal temperature setting will allow you to straighten your hair effectively while preventing unnecessary heat damage.
Hair clips — no matter what kind of hair you have, you’ll most likely want to separate it into sections while you use your straightener. Hair clips can keep everything in place while you work from one part of your hair to the next. Longer clips that can be undone with a single hand are the most convenient during hair straightening, as they are easy to use but can also keep more hair in place and prevent loose strands from going astray.
Wide-toothed comb — this will help you smooth out your hair thoroughly before straightening. Not only does this help spread the product through your hair so that it is evenly cared for, but smoother hair is much easier to separate into sections and will straighten a lot quicker. Even if you’ve just shampooed, conditioned, and dried your hair, give it a once-through with a wide-toothed comb to make sure all your bases are covered.
Heat-protectant spray – every time you straighten your hair, you expose it to potential heat damage. Fortunately, there are plenty of great sprays on the market which can simultaneously protect your hair from heat and provide extra nutrients to keep your hair sleek, healthy, and nourished.
Setting spray – whether you use a second spray to keep your hair in place or a heat-protectant spray which doubles as a setting spray, you’ll want to take measures to ensure that the time and effort spent on your hair can last as long as possible. Setting spray will allow your straightening or styling to last several hours longer than usual so that you can get the most out of your work.
Prepare Hair for Straightening
Preparation is everything when it comes to how to use a hair straightener. The way you get ready will not only allow you to get the most out of your time spent but also helps to ensure that you aren’t putting your hair at risk of heat damage from your straightener.
The first step is to ensure that your hair is maximally clean and nourished to allow for optimal hair-straightening conditions. This will let the effects of using a straightener last as long as possible and also ensure that your hair is stronger and less susceptible to heat damage. Using shampoo, moisturising conditioner, and drying your hair on a low-heat setting before straightening can make a world of difference.
From there, always be sure to apply heat protector spray to your dry hair before straightening. The nutrients contained in a good-quality spray is what allows your hair to stay strong despite everyday straightening, so never forget to do this significant step. It’s crucial for maintaining the long-term health of your hair.
Finally, go through your hair with a wide-tooth comb to take out any tangles or knots before straightening. These combs are specifically recommended since many brushes can cause frizz, which is not ideal before using a hair straightener. If you have thicker hair, you’ll then want to neatly pin it into a few separate sections to make the task of straightening more manageable. From there, you’ll be ready to start straightening your hair.
Rough Dry Your Hair
Rough drying is an important step which, if done correctly, will help your hair look fantastic and sleek once you’ve finished straightening it. The trick is to give your hair a light all-over dry by shaking the hair dryer back and forth around your head to achieve evenness. Once your hair is about 80% dry all around, you have the option to let it finish air-drying or finish blow drying it on a very low heat setting.
Keep in mind that although poor straightening techniques can lead to heat-damaged hair, damage can first start when you use misuse your blow dryer. Although using a high-temperature setting will dry your hair faster, it will also quickly dry it out and make it more vulnerable to straightener damage. This is especially true if the straightener is also used at a higher temperature.
Simply put, rough drying is the perfect technique to use out of the shower to prepare your hair for straightening because it minimises the possibility for permanent heat damage to your hair.
Only Straighten Dry Hair
This cannot be overstated, as it’s one of the most essential aspects of straightening your hair: only straighten your once it’s completely dry. The most common and most dangerous mistake is the misinformed assumption that because your straightener is hot, it can double as a hair dryer to save you time.

Consider this: there is a temperature at which heat will begin to damage your hair, but at a moderate or low heat setting, your hair will never get this hot if you straighten it properly. However, this temperature limit will be lower if your hair is wet, so hair can get damaged much quicker and easier than if it was dry.
If you still experience some damage even though you only straighten your hair when it is totally dry, it may be the result of product being built up in your hair. Whether it’s dry shampoo or a holding spray,
these products can cause damage when heated up by your straightener. That’s why it’s recommended to straighten your hair when it is newly-cleaned and free of any product or knots.
Use a Heat Protectant
A good heat protectant is the first line of defence against heat damage for your hair. These products are designed to nourish and protect your hair when exposed to high temperatures, and they even resist frizz-causing humidity. From both a styling and a health standpoint, you can’t afford to forego this vital measure when straightening your hair.
Use the Lowest Amount of Heat to Prevent Damage
The level of heat you use is one of the most important factors, mainly if you use your straightener on an almost daily basis. Everyone’s hair is different, so you’ll need to experiment with which temperature is ideal for you in terms of how long it takes to straighten your hair, how effective the results are, and how much it dries out your hair. In a perfect world, you’ll be able to determine the lowest temperature setting that works for you, and consistently use that setting when straightening your hair.
Many high-quality straighteners have high-temperature settings intended for special use such as keratin treatments rather than everyday straightening. However, several people use these high temperatures on a regular basis, focusing only on how it speeds up the process and forgetting about the consequences. Although a higher temperature setting will get the job done quicker, it will also dry out your hair and make it brittle and unhealthy in the long run. Opt for lower heat when straightening your hair and focus more on its long-term health when straightening it.
Straighten One Section at a Time
By neatly dividing your hair into sections and straightening them one at a time, you can avoid taking on too much hair at once and over-drying or under-drying certain parts. Evenness and consistency are the secret to perfectly styled hair and dividing it into sections before straightening it is what will allow you to achieve that.
Although this is an extra step in the process, it ends up saving you time. Rather than grabbing chunks of hair at random and hoping that you managed to straighten everything, sectioning will give you a systematic way to work through the job without going over the same areas multiple times.
Keep Hair Taut
Keeping your hair taut will allow you to straighten it in a short amount of time. Naturally, less exposure to a straightener means a reduced chance of heat damage, and that should always be the goal when straightening. This seemingly simple step will make the straightening process more efficient and save you valuable time.
Choose the Right Flat Iron
Choosing the best flat iron vastly depends on the length and thickness of your hair. When you are searching for the best hair straighteners available on the market, be aware of what factors will make a
difference for your hair. Ceramic plates are ideal because they heat up evenly and allow you to dry your hair consistently during use. Also, the size of the plates should correspond to the length of your hair; narrower plates work well for shorter hair, and wider plates are better-suited for longer hair.
Prevent Hair Damage from Straightening
Many beauty enthusiasts suffer from hair straightener damage. However, there are plenty of steps that you can take to minimise and prevent flat iron hair damage during your everyday styling. With just a few preventative measures, quick tips, and the right equipment, you’ll be looking great without putting your hair at risk.
Straighten after using shampoo and conditioner — clean hair is easier to straighten, which means you can get the job done faster. The goal should always be to minimise the amount of time that your hair is exposed to heat from your straightener, and this is one of the easiest ways to do it.
Comb through before you begin — knots and tangles can quickly make straightening a bit more complicated, as it is difficult for your straightener to pass through hair that isn’t smoothed or combed. By giving your hair a comb-through from top to bottom, you can create the ideal conditions for a safe and fast straightening job.
Only straighten dry hair — wet hair will sizzle and suffer from severe heat damage at a much lower temperature than dry hair. Rough dry your hair using a blow dryer at a moderate temperature before straightening, and only pick up the flat iron when you’re sure that your hair has dried completely.
Use a low-temperature setting — the lower your flat iron’s temperature is set, the less likely it will be that your hair is exposed to potential heat damage. Just because your straightener has a maximum temperature setting doesn’t mean you need to put it that high to get the results you want. Experiment a bit to find the minimum heat setting that allows you to straighten your hair the way you like without turning the dial up to the highest temperature. Your healthy hair will thank you in the long run.
Use sectioning — depending on how thick your hair is, sectioning can be used to help you organise your hair before straightening. This is a great way to ensure that you don’t miss any strands of hair or pass through the same strand multiple times with a hot flat iron. In the end, it is a time saver and a preventative measure against heat damage.
Pull your hair taut — the increased tension of taut hair will allow you to straighten it more quickly, which effectively results in less exposure to the straightener and the high temperature of its plates.
Buy a Quality Hair Straightener for Best Results
There are several good-quality straighteners on the market today, ranging from quite cheap to expensive. Your hair straightener is much more than a simple tool—it’s an investment in the long-term health of your hair. Opting for a high-quality hair straightener can mean the difference between healthy hair or dry, damaged hair.
This doesn’t necessarily mean you need to choose the highest rated hair straightener exclusively from the list of the most expensive straighteners; just aim for one with ceramic plates and a variety of heat
settings so that you have the flexibility to tend to your hair in a way that gives you the results you want in a way that is safe and sustainable for long-term use.
By keeping all these tips in mind, you’ll be on your way to getting the most out of your hair straightener. If you are looking to learn how to use a wave iron, feel free to browse our many tutorials! Whether you are looking to learn how to flat iron your hair silky straight or you’re on the hunt for the best flat iron in 2019, we hope we were able to help!
]]>The best part about this look is that the amount of work that goes into achieving it is reflective of the style itself: it’s easy-going, it takes little effort, and isn’t complicated or stressful. Once you’ve experimented with it a little bit, you’ll love having this quick and simple style at your disposal any time you need it. It only takes a few minutes to complete, and there’s no pressure for the look to be perfect since it’s intended to look natural and fun.
Beachy waves don’t require any special tools or out-of-the-ordinary styling equipment. All you need is a flat iron straightener, clips or ties to hold your hair back while you work, and some heat protecting spray. If you’re used to simply straightening your hair with a flat iron, you probably already have all these things; there’s no need to invest in any fancy or expensive extras. If you don’t yet own a straightener, check out our recommendations here.
The only thing that remains is to grab your wavy hair styling tools and read ahead to learn how to crimp your hair with a straightener to get gorgeous beach waves.
Prepare Your Hair for Straightening
Preparation is everything, and if you’re used to straightening your hair more traditionally, then you already know that the well-being of your locks, as well as the result of your styling, rely heavily upon how you prepare for it. Keep these tips in mind as you get ready to learn how to make your hair wavy with straighteners:
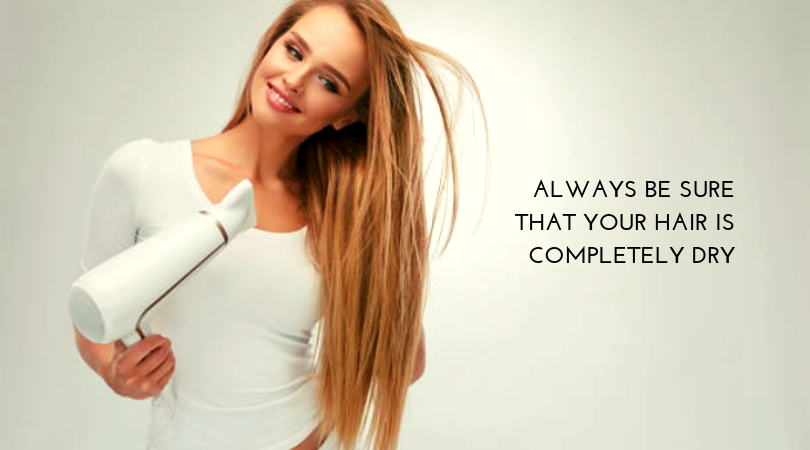 Always be sure that your hair is completely dry — this tip cannot be stressed enough, as it’s one of the most critical aspects of using a flat iron for any styling. Even slightly damp hair can heavily contribute to avoidable heat damage. The most dangerous mistake that you can make is allowing a searing hot flat iron to contact wet hair.
There is a minimum temperature at which heat will begin to damage your hair. However, at a moderate or low heat setting and with proper straightening techniques, your hair will never get this hot. If your hair is wet, this temperature limit will be lower; therefore, damp hair can get damaged much quicker and easier than it would if it was dry.
Comb through your tresses — this will get rid of any loose hairs or knots that could get caught in your flat iron and make styling more difficult.
Smooth your hair out on a low heat setting — as mentioned above, you never want it to be exposed to more heat than is necessary, as it can dry it out and lead to damage. However, when waving hair with a flat iron, it can be useful to smooth out any kinks beforehand on a low heat setting; this sets the stage for you to get your beach waves just the way you want them.
Apply a thermal protection serum — unless you’re a total pro at quickly waving your hair, you’ll be exposing it to high temperatures for an extended period. That’s no problem, as long as you apply a protective serum to your hair to fortify it against the high temperatures. This will keep it strong and healthy, especially if you use a flat iron often.
Get Beach Waves with A Hair Straightener
Learning how to make wavy hair with a flat iron may take a bit of practice, but you can learn to achieve fabulous results in no time. If you’ve only used your flat iron for basic straightening or curling up until now, learning how to make beach waves will open you up to the possibilities of just how much you can do with a straightener. You may even want to learn how to style bangs with a flat iron!
Make this look work for you by following our tips and styling guide below.
- Make sure you’re fully prepared — once you’ve allowed your hair to dry completely, combed it out one last time, and applied your thermal protecting spray, you are ready to begin. If you have any doubts, follow the tips above to ensure that you’ve covered all your bases before starting. Remember, all these steps will help to make your hair look great and keep it healthy throughout the styling process. Never sacrifice the health of your hair to look great.
- Start sectioning — dividing your hair into small sections makes it easier to organise your styling and ensures that you only service each strand of hair once. This makes things go a lot quicker, provides the best results, and prevents you from accidentally exposing your hair to a hot flat iron multiple times. When separating and pinning down different sections of hair, be sure small pieces do not get loose and go through the straightener if they already have. Depending on what kind of hair you have, the number of sections that you decide to make may vary. Some people usually opt for 2–4, but feel free to experiment to find out what makes the most sense for the thickness and length of your hair.
- Begin styling — go section by section, gripping your hair firmly, yet gently between the clamps of the straightener and rotating your wrist in either direction. Hold this position while sliding from the top of the strand all the way down from the root to the end. It doesn’t matter which way you twist your wrist, and you can even alternate the direction of this movement as you work different strands of hair. Remember: this look is meant to be fun and carefree, so there’s no need to aim for absolute symmetry or perfection. A quick tip: if you’re not 100% confident attempting this with a hot flat iron on your first try, practice the movement a few times before turning on the heat. That way, you don’t have to worry about needing to redo any sections of hair or applying heat to your hair several times.
- Work evenly from one section to the next as you go — since you’ve already sectioned your hair, it should be easy to keep track of which strands of hair have been styled and which ones haven’t. Repeat step three across each section until you have twisted your way to a gorgeous head full of beach waves. Keep in mind that the sectioning method works as a way for you to systematically work from one part of your hair to the next. Although it is an extra step in the process, it saves you a lot of time in the end and delivers the most even, consistent styling results.
- Apply the finishing touches — once you’ve worked your way through all sections of hair, apply your holding product of choice to keep your styling efforts in place all day. Don’t use anything that will make your hair feel stiff, as you want your look to fall naturally. Run your hands through your hair and tousle it a bit to give it that relaxed, fun-loving look. Remember, beach waves are meant to look natural, and they don’t need to be perfect or symmetrical. Have fun with it! Finally, take a look in the mirror and appreciate your newly-styled, flat iron waves. You are bound to get compliments and queries about how you styled your hair! This is a versatile look that you can use again and again for a variety of occasions; you’ll be addicted to it once you’ve mastered how to make it work for you, and the more you practice, the less time it will take you to complete!
Beach Waves with Flat Iron for Short Hair
You can achieve beach waves for short hair with a curling iron as well. There are definitely a few things to keep in mind which are specific to short hair when going for this look. For instance, you can get away with sectioning your hair a lot faster, and even just clipping up the top of your hair may be enough. You should also only curl about 3/4 of the way down your strands rather than all the way.
If you have short hair, you’ll want to use a flat iron that has narrower plates as opposed to wider ones. This makes it easier to get closer to the root. For example, the Babyliss Pro OPTIMA3000 Straightener is an excellent choice for short hair. It has a variety of settings and titanium plates that are well-sized for short hair, and it is designed for both straightening and curling. The adjustable 150°C-230°C temperature setting also enables a wide range of styling options. See our in-depth review for more info on the Babyliss.
Other than the size of the flat iron, the process of getting beach waves for short hair is essentially the same; definitely try these techniques if you want to create flat iron waves for a lob. This style can be
pulled off in a way that is especially cute and energetic if you have short hair, so don’t hesitate to try it out if you’re looking for a new way to spruce up your hairstyle.
Beach Waves with Flat Iron for Long Hair
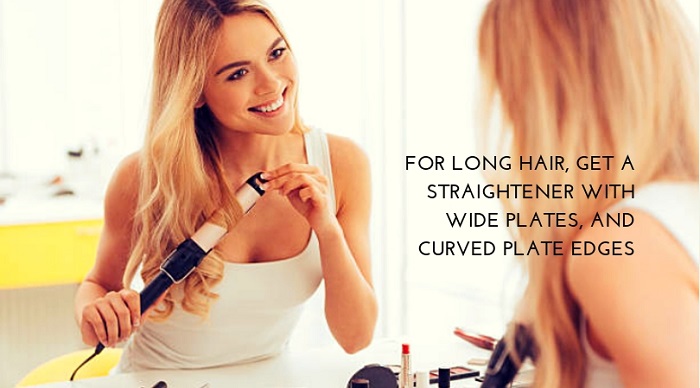 This style looks fantastic on long hair. If you have long or thick hair, you should get a straightener with wide plates, and curved plate edges so that it’s easier and quicker to get beach waves. Whether you want to get big curls with a flat iron or beach waves with a curling iron, a hair straightener will only be able to get the results that you want if it’s well-suited for your hair.
A narrower straightener would not work well on long hair for a couple of reasons. First, it would take much longer to curl all your hair; more hair equals more time and effort. It would be inefficient, which goes against the quick and easy nature of this hairstyle. Second, it would create tighter curls which are more suited for short hair.
The ghd gold max styler is a fantastic tool for getting this kind of style. If you’re looking for a high-quality, multi-purpose flat iron from one of the top brands, ghd is one of the most highly-recommended names on the market today. It may even be the best flat iron for waves.
If you already have a good idea of how to get beach waves with a curling iron, then it will be a snap for you to learn how to get flat iron waves for long hair. With the right styling tool and a bit of practice, you’ll be rocking this look in no time.
Conclusion
Beach waves are such a versatile style, and the best part is that you can get them for any hair type. They add so much personality and life to your look, and they’re an appropriate style for both casual and formal occasions. Once you become experienced with styling your hair this way, you’ll have a hard time resisting the temptation to go for it all the time.
No matter your hair type or style, always remember that there are ways to tweak these looks to make them work just for you. Using a multi-purpose, high-quality flat iron is a significant factor that will determine what styling flexibility you’ll have. It will also get the job done faster and with better results than a cheaper model would be capable of achieving. Above all, be sure to care for your hair well and to avoid heat damage if you’re a frequent flat iron user.
]]>